

Good morning all! It has been quite some time since I have given this little blog and indeed my crochet projects the attention they deserve. So, I thought it was best I rectified this as soon as possible. So here we go…
A while back I purchased a cute crochet kit from Aldi. I had seen in their little special buy magazine that they were going to have crochet kits in the shape of unicorns, foxes, reindeer and pugs. As you can imagine, my sights and heart were set on the unicorn. (The clear choice really!) However, Aldi, and indeed all the Aldi’s in the area, had other plans for me. I couldn’t find a unicorn kit anywhere. Even every member of my family had a look in the Aldi that was closest to them, in the hope that the change in location would provide me with the adorable unicorn. But alas, all to no avail. Feeling defeated, but still determined to take advantage of the ridiculously cheap crochet kit, I decided to settle for the next best thing. Which, in my books would have been the pug, but of course that would be too easy! Thus, I had to settle with the fox.
I must confess, that Fox crochet kit stayed in my craft corner for many few months. I think I was secretly angry with it as it wasn’t the unicorn. But…then the time came…and I decided to unpack and begin crocheting him.
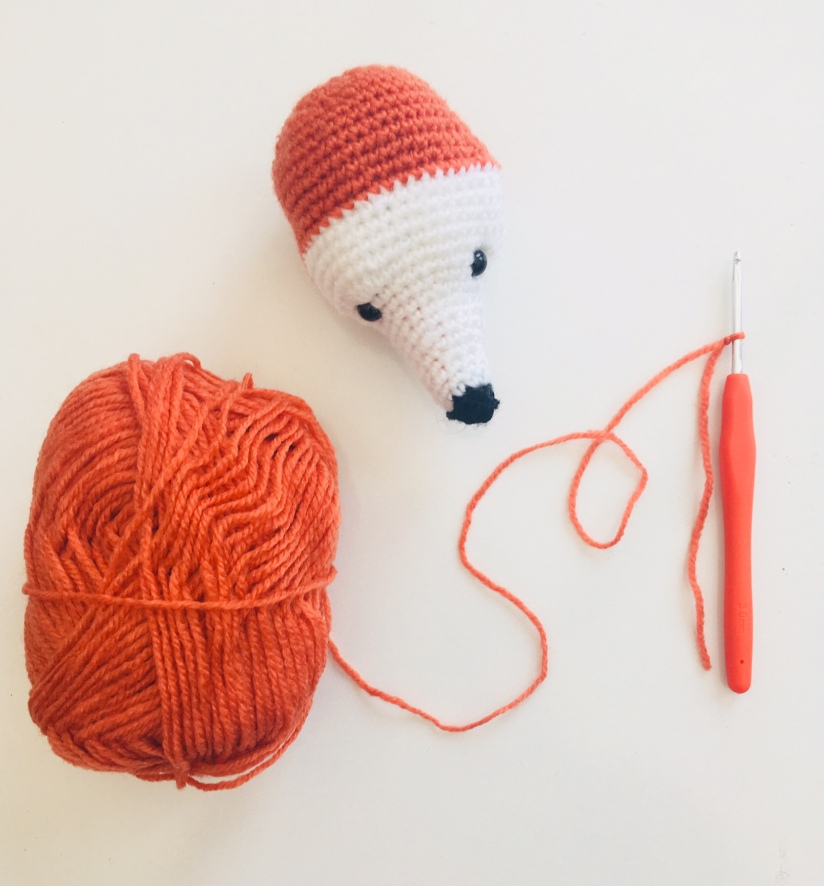
I am so glad I did! The kit was really enjoyable and it even gave me the opportunity to learn and practice a new stitch. I don’t know how familiar you are with the Afghan Stitch. It is the stitch that was used to create the little orange detail on his snout. It was a stitch that took me quite some time to get anywhere with and I found that this was because it was almost against crochet nature. In crochet it is all about hooking and pulling through the loops until you’re left with one loop on the hook. Fairly standard crochet, however the Afghan Stitch was all about crocheting but leaving all the loops on the hook until the end of the round. I found it quite tricky at first but after a few failed rounds I prevailed! I think this particular stitch would be very useful for creating additional details to amigurumi projects and I’m quite excited about incorporating it into a few projects that I am working on at present.

Furthermore, I received some light up crochet hooks for Christmas and I used one of the hooks from the set for this project. Initially, I had only shown an interest in the light up crochet hooks for the novelty and I wanted to see what the appeal was, however, after using the hook for the little fox I have to admit that they are among the comfiest hooks I own. I’m not sure if it’s the transparent hook, the lightweight structure or the shape of the grip, but collectively these elements make the hooks especially easy to work with. I will also admit that I have not used any other hook since! I’d definitely recommend giving them a whirl, they aren’t very expensive and if anything you can pretend you’re in a Harry Potter movie and utter ‘Lumos‘ as you point and switch your hook on! (They are however, rather difficult to photograph well! Exhibit A, as seen below!)

Happy Crafting Everyone!
Jasmin
at The Little Crochet Caddy

Gorgeous fox!
LikeLike
I’m just starting fox but can’t get to grips with but don’t understand where it says 1 x 2 AStog means can you help
LikeLike
Hi Lou, I think I know the bit you are talking about, for the orange detail on his face. Have you got to grips with the Afghan Stitch? (YouTube has lots of good tutorials of the stitch) The 1 x 2AStog is essentially the Afghan Stitch decrease. I hope that’s helpful to you.
LikeLike
hello Lou, thank you for the encouragement. I am having trouble understanding the start of the body section of the Aldi fox. Can you help?
LikeLike
Hi Sara, which part of the Fox is giving you trouble? What does the pattern say? 🙂
LikeLike
Hi, you’ve given me hope that is pattern is doable! Can you explain in beginner’s terms what it means on the nose section by e.g. Round 3: 2×2 AS2tog, 16 AS, 2×2 AS2tog (18 AS)? I understand that there needs to be a decrease but is that the 2tog or the 2×2 or does it mean double AS and decrease and how do I end up with more stitches in the second part of the round? Thank you.
LikeLike
Hi Hannah, that’s so nice to hear! It took me some time to get to grips with the pattern, but it was definitely worth it in the end! Unfortunately I have misplaced my pattern for it, otherwise I could have another look at it, but I have a feeling there was a bit in the pattern that was a misprint. (Or at least didn’t work for me) How many stitches were in Round 2 and Round 4?
LikeLike
Hi, haha the instructions are confusing enough without a misprint, google couldn’t even understand them. Thanks.
Round 2: 1×2 AS2tog, 16 AS, 1×2 AS2tog (18AS)
Round 3: 2×2 AS2tog, 10 AS, 2×2 AS2tog (14 AS)
Round 4: 2×2 AS2tog, 6 AS, 2×2 AS2tog (10 AS)
LikeLike
I know! This little bit for the foxes face is harder than the rest of the whole pattern. I remember making everything else first just because it was so confusing. But yes, I think I know what to do. So when it says 1 x 2AS2tog it means one decrease. So stitch two Afghan stitches together. Round 2: 1 decrease, 16 stitches, 1 decrease. (18) Round 3: 2 decreases (so stitch two together, then another two together) 10 stitches and then 2 decreases (14) Round 4: 2 decreases, 10 stitches, 2 decreases (10). I don’t think it needs to say 2 x 2AS2tog, it just needs to say 2 x AS2tog. I hope that is helpful to you and will help you finish the little guy! Let me know if you need anymore help 😇
LikeLike
That makes much more sense, thank you ever so much! I think I’ll follow your suggestion and start with the rest of the fox first. Thanks :D.
LikeLike
You’re very welcome! I’d love to see your Fox when it’s all finished! 😇
LikeLike
Hi.
I’m just trying to make a start on this little fox but can’t for the life of me get to grips with AS in the round without a double ended crochet hook and 3 balls of yarn and don’t seem to be able to find a YouTube video of AS with a normal hook and single ball of yarn. Can you help? Thanks
LikeLike
Hi Becky, The AS portion of this Fox is by far the hardest part of the whole pattern. I started with everything else and did the AS last. I found a Bella Coco tutorial on YouTube for Tunisian Crochet (which I’m almost sure is the same thing) and hopefully it will help. https://youtu.be/a8LJDHD-fK0 I think usually you need a long hook for this particular crochet stitch but as the patch you are making for the fox’s face is so small, you can get away with using a normal hook as long as it is one without a grip. I hope this is helpful to you. Let me know how you get on! 🙂
LikeLike
Hi i have just started the fox kit…have done the nose piece and head however the nose piece is too small to cover the white of the head plus my afghan stitch looks nothing like the picture on the pattern or even your photo of your fox finished…can you help?
LikeLike
Hiya, I can certainly try! When I was trying to figure out the Afghan stitch, I watched a lot of YouTube videos which I found to be very helpful. The orange Afghan piece doesn’t really cover a huge portion of his head. Have you tried sewing it on? As it might stretch to the amount that you need it to? I hope that makes some sort of sense! Let me know if you need any further help. 😊
LikeLike
Hi, my dog has just chewed up part of my pattern. I am missing the legs and the nose parts. Can you help me please! I have nearly finished the head and then she goes and chews it. Could you screen shot it please and put it on here. Jo x
LikeLike
Hi Jo. Unfortunately I don’t have the pattern anymore. If you give Aldi customer services an email, I am sure they would be happy to help. Sorry I couldn’t be more helpful! Thank you, Jasmin
LikeLike
I am also trying to make the fox kit but I am a relative beginner and when I’m doing the rounds for the head I’m finding that I end up with an extra stitch in every round. I tried omitting the first chain stitch in the round thinking that would help but somehow it is still happening – any idea what I’m doing wrong?
LikeLike
Hi Andrea, that’s an interesting one! Have you tried using a stitch marker to keep track of exactly where you are in the round? That way you might be able to see where the extra stitch is coming from? Sorry I couldn’t be more helpful with this one. Thank you, Jasmin
LikeLike
Hello!
I’m finally getting around to making this little fox, but I’m struggling to understand what the start of the body section means. The instructions say:
Make an adjustable ring and ch 9.
Round 1: start in the 2nd ch on the hook: 1×2 dc, 7dc, 3dc through the ring, pull the short tail to close and join the ring, continuing with 7 dc. Close round (19 dc).
I’m not sure how this makes a round shape or where the final 7 dc are meant to go. I managed the afghan stitch after reading your previous comments and looking up various tutorials, but I haven’t been able to find anything that sheds some light on this…
LikeLike
Hi Megan,
I am glad you managed the Afghan stitch, which I still find one of the hardest stitches to figure out!
The start of this pattern for his body is not going to form a circle but more of an oval shape. Once you have chained 9, you are working back down the chain. Once you 3dc into the adjustable ring, then you are working your stitches along the other side of the chain. So you should end up with 19 stitches around and then you will work up from there. If you search Amigurumi chain start or oval start on YouTube, you should be able to find an example of it.
I hope that makes some sort of sense! Let me know how you get on!
LikeLike
Thanks for your help with this!
It took me a while, but I did get there. I’m really happy with how to came out, and it was a great way to learn some new techniques (though I’ll definitely have to look up the Afghan stitch every time!).
LikeLike
You are very welcome!!
LikeLike
Thanks so much for this.
I’m a newbie and I’ve started on the body section.
For some reason, even though I’ve meticulously counted stitches, I finish half way up the other side, so if I join to the single chain its quite far away.
Also when it says 1 x 2 dc, does this mean do 2 dcs in the one stitch?
Thanks so much
LikeLike
Thanks so much for this!
I’m a newbie and have started with the body. I’ve meticulously counted the stitches yet when I come around the other side I seem to finish half way up and quite far from the single chain I need to close on?
Also when it says 1 x 2 dc does this mean do 2 dc in the same stitch?
Thanks so much
LikeLike
Hiya! I’ve not actually got the pattern anymore but I will do my best to help! With amigurumi bodies, they usually start with 6 dc into a ring and then 2 dc into each of the 6 stitches to make 12 stitches on that round. They then tend to increase by 6 each time, so the next round will have 18 stitches. So usually on this round it would be 1 dc into a stitch then 2 dc into the next stitch and this gets repeated 6 times. Sometimes a pattern says Increase, which would be 2 stitches in the same stitch. I think you’re right on the fox pattern that the 1 x 2dc does mean in the same stitch. Sometimes they say (2dc into next stitch, 4dc) which would be 2 double crochets into one stitch and then 4 double crochets into the next 4 stitches. (One dc in each) I hope this makes sense and helps! Let me know if you have anymore questions. Kind Regards, Jasmin
LikeLike
Hi, I also have had this kit fora little while and decided to complete it now, but it doesn’t have the instruction booklet!!! Wondered if you or anyone here could send me a photo of it please unable to find it anywhere online. Thanks in advance
LikeLike